Content
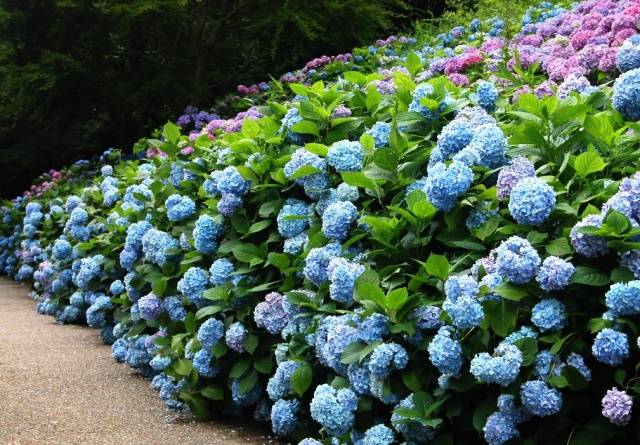
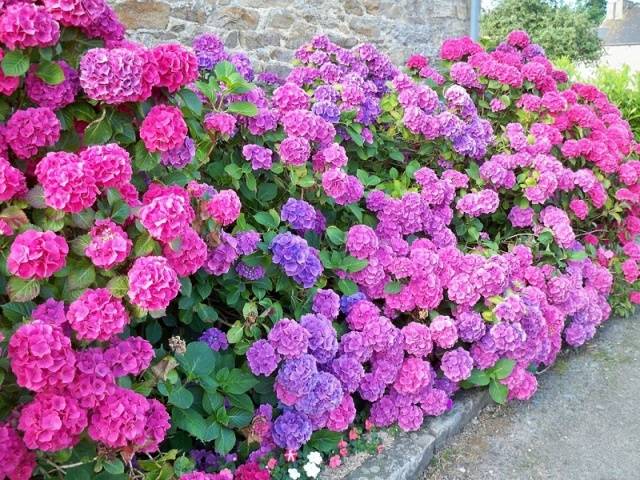
A lush hydrangea bush, strewn with bright bunches of flowers, makes many growers want this regal beauty to grow on a personal garden plot. And if it is not difficult for professionals to propagate a hydrangea, then beginners have a lot of questions. What methods of propagation of hydrangeas in autumn are there? What is the most optimal and effective method? When is the best time to do this: in the spring, summer or fall? What rules do you need to follow to be successful? You will find answers to these and many other questions in this article.
What are the ways of propagation of hydrangeas
Like many garden flowers and shrubs, hydrangea can be propagated in several ways:
- Seeds;
- By cuttings;
- By dividing the bush;
- Layers;
- Children (or shoots).
Each method has both advantages and disadvantages.
For example, when planting hydrangea seeds, you should prepare for the fact that this method of reproduction will require much more care than others. Another disadvantage is the low germination of seed and a 100% guarantee that you will receive the variety that you ordered, of course, there is no. Therefore, gardeners prefer to propagate hydrangea by cuttings, dividing a bush or layering. These methods are the most optimal. Moreover, they do not require any skills or abilities. Even a beginner can cope with them.
Propagation of hydrangea by cuttings
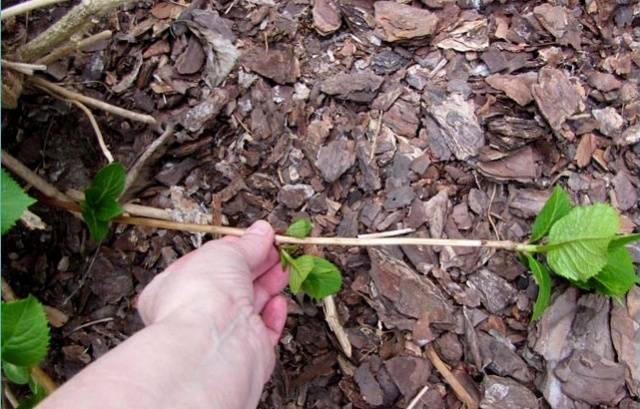
Propagation of hydrangea by cuttings is the easiest and most affordable method. When you grow a gorgeous hydrangea bush strewn with bright flowers from an 8-10 cm cutting, with the utmost love and care, is this not something to be proud of? With this growing method, it is important to take into account several nuances.
Unlike many garden flowers and shrubs, hydrangea cuttings can be propagated both in summer, from early July, and in autumn, until the end of September. But in the summer, cuttings can be planted directly into the ground, and in the fall they need to be planted in boxes or containers for rooting at home. Throughout the winter, the plantings need careful care, and only in the spring are the rooted seedlings planted in the garden.
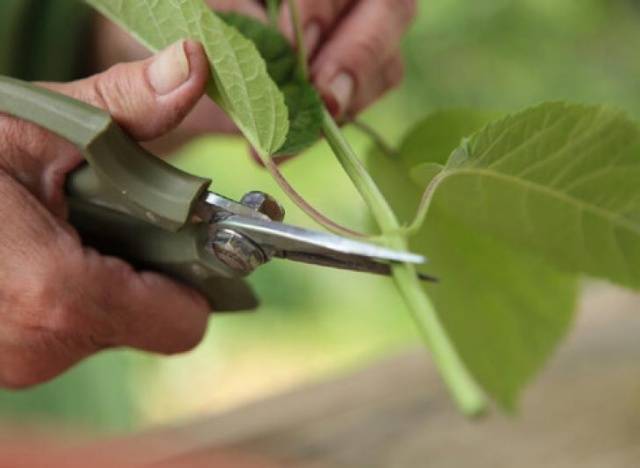
- It is important to carry out all work only with clean, sharply honed garden tools.
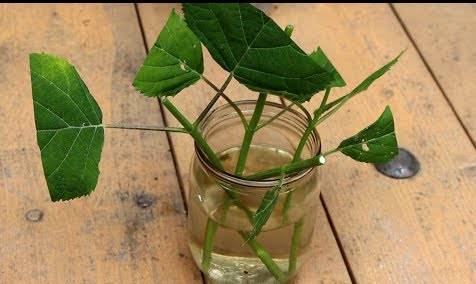
- You can cut planting material only in cloudy weather or early in the morning - at this time, the branches contain a lot of moisture, which is so necessary for this plant. It is strongly not recommended to leave hydrangea cuttings without moisture, even for a short time. Immediately after cutting, they must be placed in water.
- When cutting hydrangea cuttings, choose green, non-lignified branches. It is best to cut the planting material from the lower side shoots, from the most illuminated side of the shrub.
-
The top must be cut off - it is not suitable for grafting.

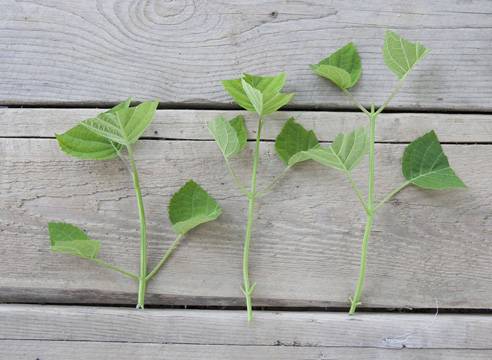
- Cut hydrangea shoots can be divided into several cuttings. The main thing is that each of them has at least 2-3 pairs of leaves. The lower pair of leaves must be cut off, but the upper leaves should be shortened by a third or half. And one more nuance: both cuts, upper and lower, must be done at a distance of at least 1 cm from the kidney. It is desirable to make slices oblique.
-
Immediately after cutting, the planting material must be placed in a pre-prepared solution for 2 hours. It is necessary to add any stimulant to the water to accelerate root formation - root, heteroauxin or zircon.In this case, the upper cut leaves should not touch the water. Place the hydrangea cuttings in a dark place.
It is undesirable to plant hydrangeas in an open place - the sun's rays burn the leaves. - If you do not have a root stimulant, dilute a teaspoon of honey in one glass of water. In this case, callus - growths that indicate the beginning of root growth - are formed much faster.
- Immediately before planting, dip the top cut in melted paraffin, wax, or brilliant green.
-
The soil for the propagation of hydrangeas also needs to be taken care of in advance. The ideal option is a mixture of peat and sand in a 2: 1 ratio. Mix well. If it is not possible to get peat or sand, you can use ready-made soil for growing azaleas. It is perfectly balanced and suitable for rooting hydrangeas.
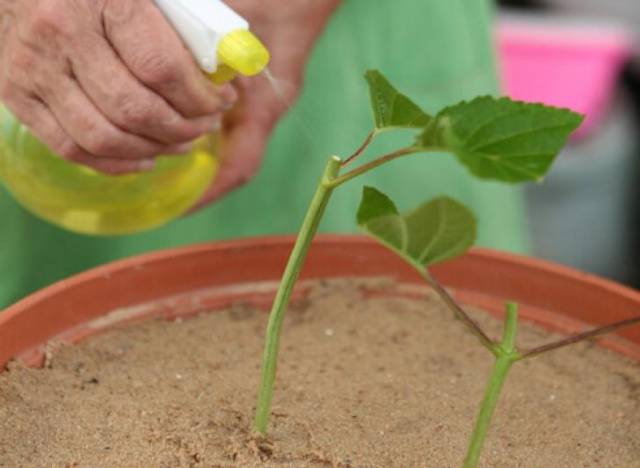
- Slightly moisten the prepared soil with a sprayer and plant the cuttings to a depth of no more than 2-3 cm. The upper buds with the leaves left should in no case touch the soil. For fast rooting, cover the planted material with glass jars or cut plastic bottles. Each seedling must be covered with a separate jar. If you decide not to cover the plantings, then the distance between the cuttings should be 5-7 cm.
- Fill the soil with a small layer of sand - 2-2.5 cm will be enough.

If hydrangea cuttings are covered with jars, they should be watered at least 1-2 times a week. You do not need to remove the cans when watering. If you left hydrangea seedlings open, then during the day they need to be sprayed with a spray bottle at least twice.
When cutting planting material, keep in mind that young bushes that are not even a year old are still unsuitable for the propagation of hydrangeas. Not only did they not have time to adapt to new conditions, the root system of the shrubs is very weak and you can easily ruin the plant.
Rooting of cuttings of hydrangea in both cases occurs in at least 25-30 days. The fact that all the work was done correctly and the planting material began, you will be prompted first by the swollen upper buds, and later the leaves that appeared. Until you see these signs of rooting, it is not recommended to remove the jars from the cuttings.
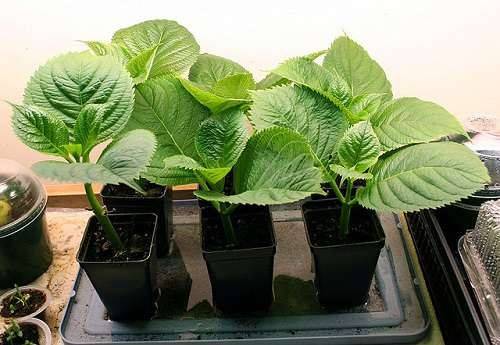
After the first hydrangea leaves appear, the jars or bottles must be removed. Now, until spring, when it will be possible to plant seedlings in the garden, it is necessary to ensure the plantings with regular watering and spraying of the leaves at least 1-2 times a week. During this period, it is important to prevent a sharp temperature drop. A small jump in 5˚C-7˚C will be enough to kill weak plants.
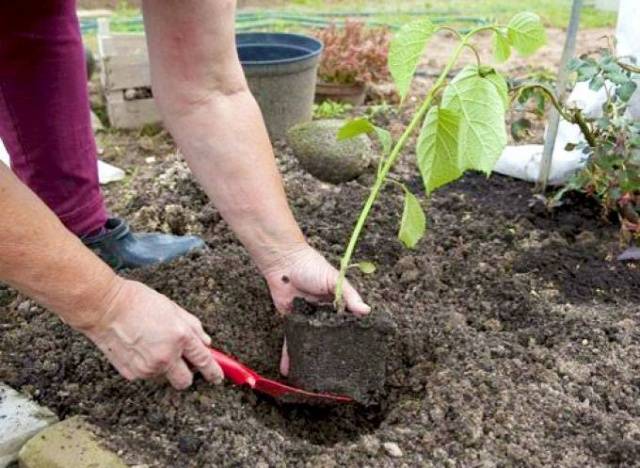
At the onset of spring, the rooted seedlings are planted on a specially prepared bed for growing or immediately at a certain place.
Before transplanting hydrangea seedlings to a personal plot, they must be gradually "hardened". For this, the container or boxes with plantings are daily taken out into the street, first for an hour. Gradually, the "walk" time should be increased. After a week, young shoots can be planted in open ground.
You will learn how to propagate hydrangea with green cuttings from the video
Propagation of hydrangeas by dividing the bush
Hydrangea can be propagated by dividing the bush until the third decade of September or in early spring. If separated bushes are planted in early October or even later, the plants will not have time to root enough, gain the required amount of nutrients and fully prepare for winter.
To propagate a hydrangea bush, you need to carefully dig it up. It is best to dig up the shrub with a pitchfork to avoid damaging the roots. The dug out plant is divided into small divisions.When dividing, special attention should be paid to the kidney renewal. There should be at least 2-3 of them on each section.
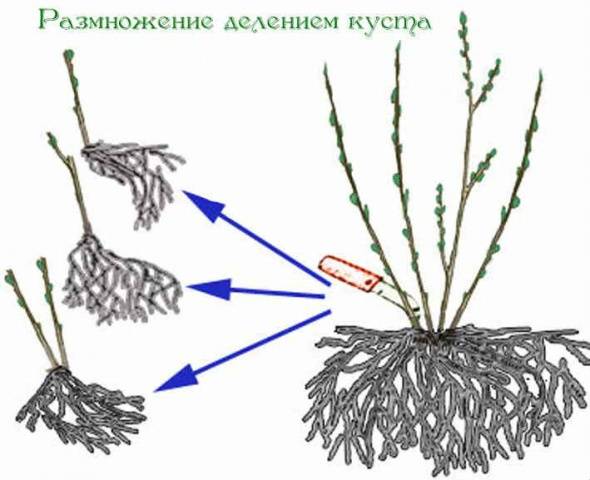
Transplant each separated part of the bush into pre-prepared planting pits. Do not forget that every hydrangea seedling must be watered abundantly. If autumn is generous with precipitation, then there is no need to water the bushes. If precipitation in the autumn period is extremely rare, the plants must be watered every day or every other day.
There is a second way to divide the hydrangea bush, but without digging it up. Carefully make a small undercut at a distance of 15-18 cm from the extreme shoots. Carefully separate part of the bush along with the roots and clean pruning shears, cut off the roots leading from the branches. The separated part must be planted immediately.
This method of dividing the bush is more gentle. Moreover, large and large shrubs can be rejuvenated in this way.
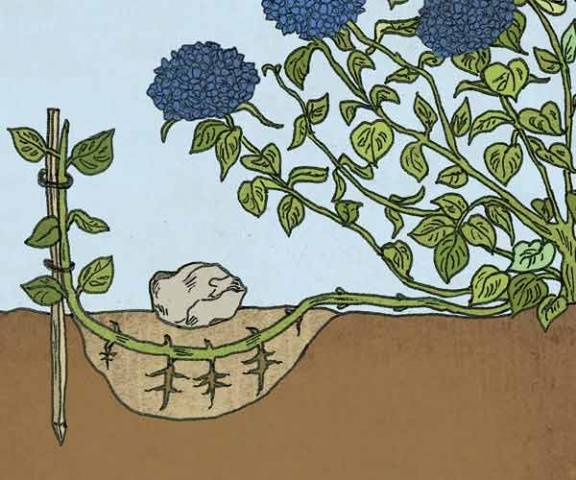
Propagation of hydrangea by layering
Gardeners recommend propagating hydrangea by layering in early spring or late autumn. Work should begin when the garden hydrangea has faded. It is best to combine this process with the preparation of shrubs for winter. The whole procedure will not take so much time and effort, and by spring several young rooted shoots ready for transplantation are formed immediately from one branch.
Interesting! Despite the fact that all parts of this plant contain poison, the roots of hydrangea have a powerful anti-inflammatory and wound healing effect and in the old days they were actively used for treatment.
-
Dig up the soil around the hydrangea bush. You should not go too deep so as not to damage the root system. A depth of 15-18 cm will be sufficient. Level the ground thoroughly.
- Make shallow, 1.5-2 cm grooves from the bush in the form of a radius.
- One branch of the hydrangea should be laid in one furrow.
- In several places, each shoot must be pinned to the ground using a small wooden spear or metal hooks.
- The upper part of the shoot, about 12-15 cm, should be left above the ground. it is desirable that the upper part stands upright without bending to the side.
- Sprinkle earth on the hydrangea shoots. Too thick a layer of soil should not be poured, otherwise it will be very difficult for young shoots to break through the compacted soil.
-
Very soon, after 2-3 weeks, the first shoots will begin to appear above the ground. When shoots reach a height of 8-10 cm, they must be hilled.
- Do not forget about regular watering not only of the main bush, but also of the grooves with shoots.
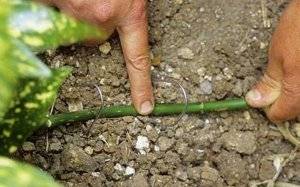
When propagating hydrangea by layering, it should be remembered that lignified branches in this case are undesirable.
It is possible to divide the layers into seedlings and transplant to another place only in early spring or a year later, in the fall.
This method is not often used by gardeners for growing hydrangeas. With the systematic care of the branches on the bush, there are not so many. But due to its ease of implementation and excellent results, it is still perfect for the propagation of hydrangeas.

Conclusion
As you can see, any of the hydrangea breeding methods described above is simple and accessible to every novice gardener. The only rule is not to forget about constant watering, because these delicate flowers are very fond of moisture. When the first bud ovaries appear on the self-grown hydrangea bushes, and subsequently it blooms with lush bright flowers, you will be able to admire the results of your painstaking work for a long period.


